Getting started
Follow the steps below to deploy the full solution — from SharePoint data preparation all the way to a working Teams app.
This guide walks you through five stages:
① Prerequisites → ② Prepare the data → ③ Deploy to Azure → ④ Configure MCP & agents → ⑤ Ship the Teams app
Prerequisites�
To run this solution, you'll need the following:
| Requirement | Details |
|---|---|
| Azure subscription | With Owner permissions to deploy infrastructure and manage resources |
| Microsoft 365 Copilot | A valid license |
| Microsoft 365 Agents Toolkit | CLI + VS Code extension |
| Node.js | v22 or later |
| PowerShell 7 (Core) | Install guide |
| Azure CLI | Install guide |
| Bicep | v0.38.3+ — Install guide |
Install the required PowerShell modules before proceeding:
Install-Module -Name Az.Accounts, Az.Resources, Az.Websites, Az.KeyVault -Scope CurrentUser -Force -AcceptLicense
Clone the GitHub repository from here https://github.com/FranckyC/agents-league-whatever-ai-assistant and open the root solution folder.
Prepare the data
This solution demonstrates a common use case encountered in companies: getting answers or taking actions about specific internal transversal domains. We take the example of HR and IT departments (likely the most common ones), each having their own SharePoint site with policy documents. Employees can ask questions related to these policies and get answers grounded in the documents. For the IT agent, we also showcase a ticket submission system via a SharePoint list.
SharePoint sites
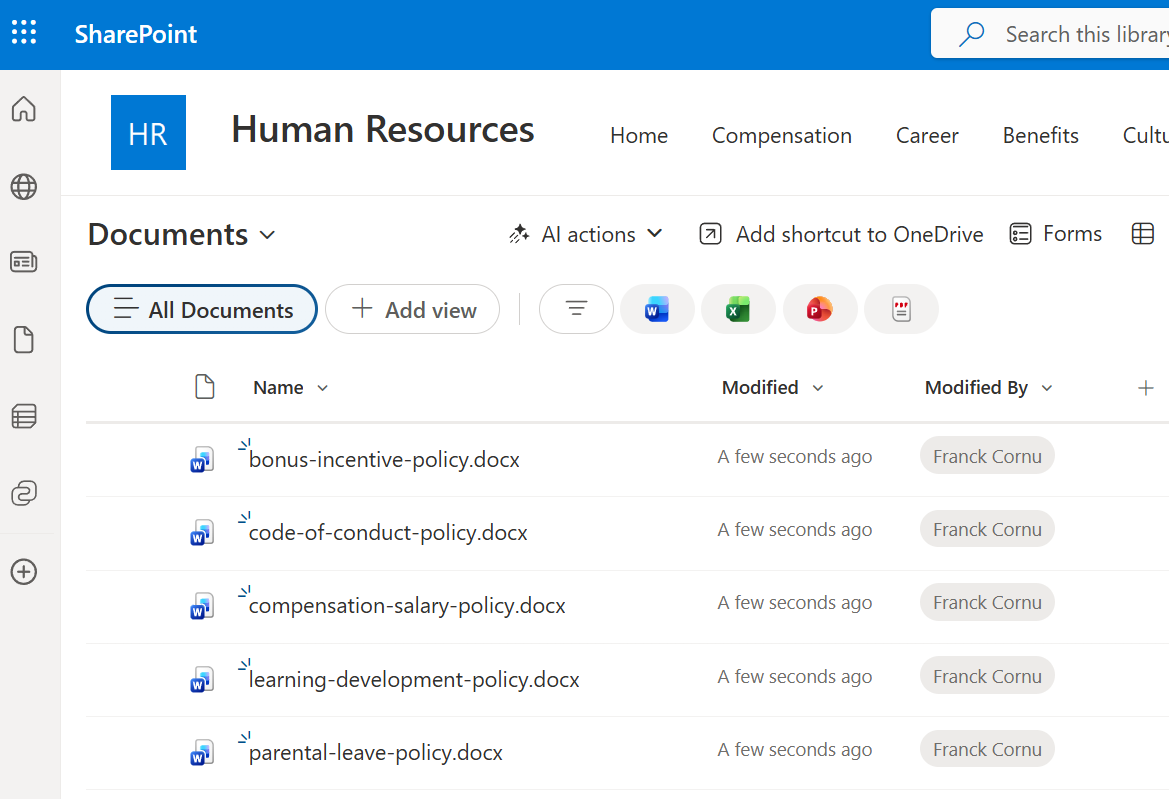
- 📋 HR site
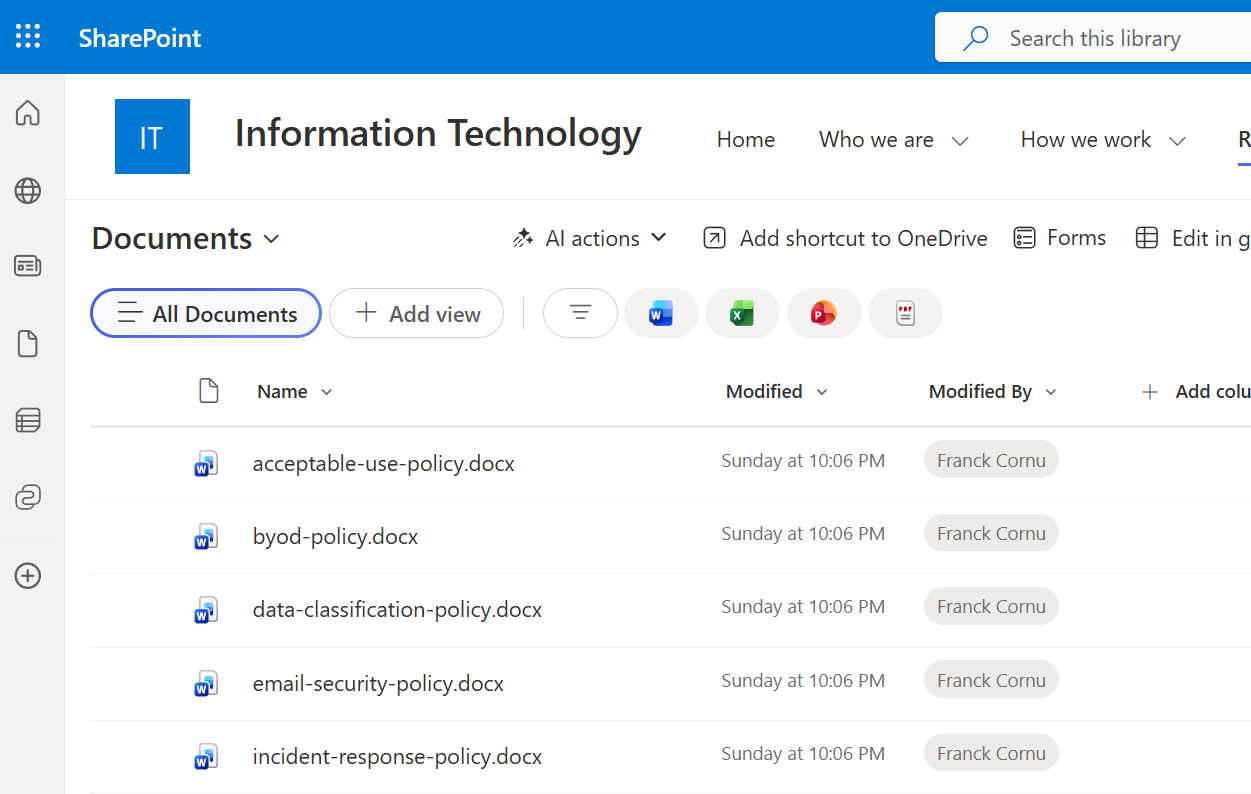
- 🖥️ IT site
- Create a new blank SharePoint communication site for HR (e.g.,
https://<your-tenant>.sharepoint.com/sites/hr-portal). - Upload the sample documents from
/deploy/data/hrto the default Documents library. These include fictional HR policies (vacation, remote work, code of conduct, etc.) that you can use to test the solution. Feel free to add your own documents as well.
- Create a new blank SharePoint communication site for IT (e.g.,
https://<your-tenant>.sharepoint.com/sites/it-portal). - Upload the sample documents from
/deploy/data/itto the default Documents library.
-
Create a new blank list called Tickets and add the following columns. You'll need to set the exact same column internal names for the MCP tool configuration later. This list is used to create tickets submitted by the user from Teams via the MCP tool
submit_ticket.Column (internal name) Type ticketDetailsMultiple lines of text ticketSeverityChoice — values: Critical,Medium,Low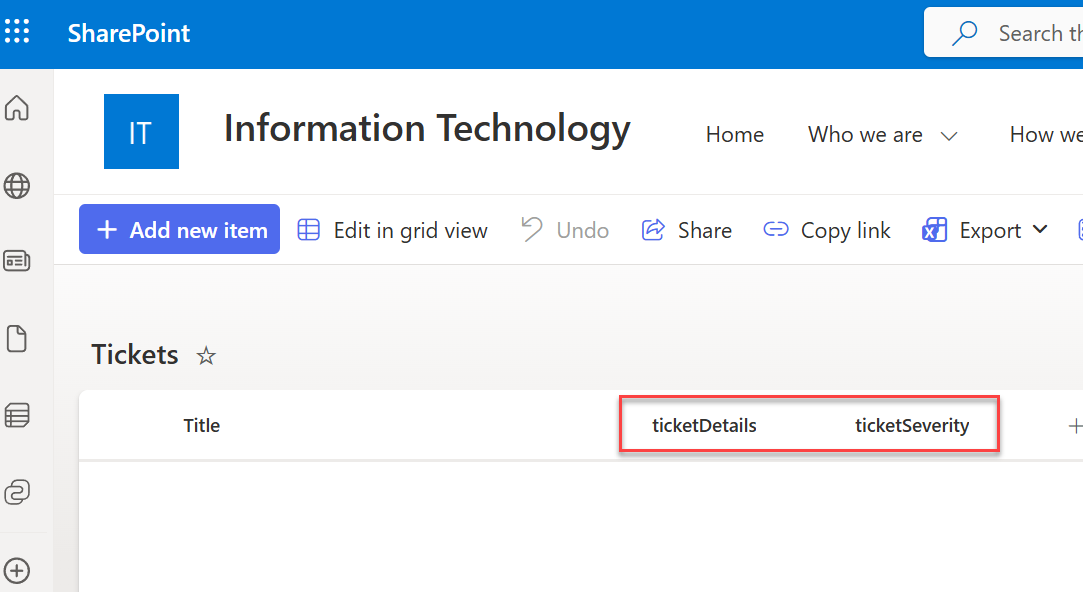
Deploy infrastructure in Azure
Set up variables
The first step is to configure your environment variables. These variables are used for scripted deployment via the /deploy/variables.local.ps1 file. Update this file with your own values before running the deployment scripts.
Copy /deploy/variables.example.local.ps1 and rename it to variables.local.ps1, then fill in your values.
| Variable | Description | Example |
|---|---|---|
ENV_AZURE_ENV_NAME | A unique identifier to distinguish your deployed resources. Used to generate a unique resource ID prefix. | franck |
ENV_AZURE_LOCATION | The Azure region where resources will be deployed. | canadaeast |
ENV_AZURE_DEPLOY_TENANT_ID | The tenant ID of the Azure subscription where resources will be deployed. | xxxxxxxx-xxxx-xxxx-xxxx-xxxxxxxxxxxx |
ENV_AZURE_DEPLOY_SUBSCRIPTION_ID | The subscription ID of the Azure subscription where resources will be deployed. | xxxxxxxx-xxxx-xxxx-xxxx-xxxxxxxxxxxx |
ENV_SP_TICKETS_LIST_URL | The URL of the SharePoint list used for ticket submission in the IT agent (the one you created earlier). | https://<your-tenant>.sharepoint.com/sites/it-portal/Lists/Tickets |
The Foundry resource is created in the eastus2 region to ensure the OAuth Identity Passthrough feature is available. However, the rest of the infrastructure (App Service, Key Vault) is deployed in the region specified in your variables file (e.g., canadaeast).
Run the deployment
Open a new pwsh terminal and run the following script from the /deploy folder:
./deploy-solution.ps1 -Verbose
The script will prompt you to log in to your Azure account and select the appropriate subscription. Follow the instructions in the terminal to complete authentication.
The script performs the following operations:
- Deploy all required Azure resources (App Service, Key Vault, Log Analytics workspace, etc.) using Bicep templates and a deployment stack.
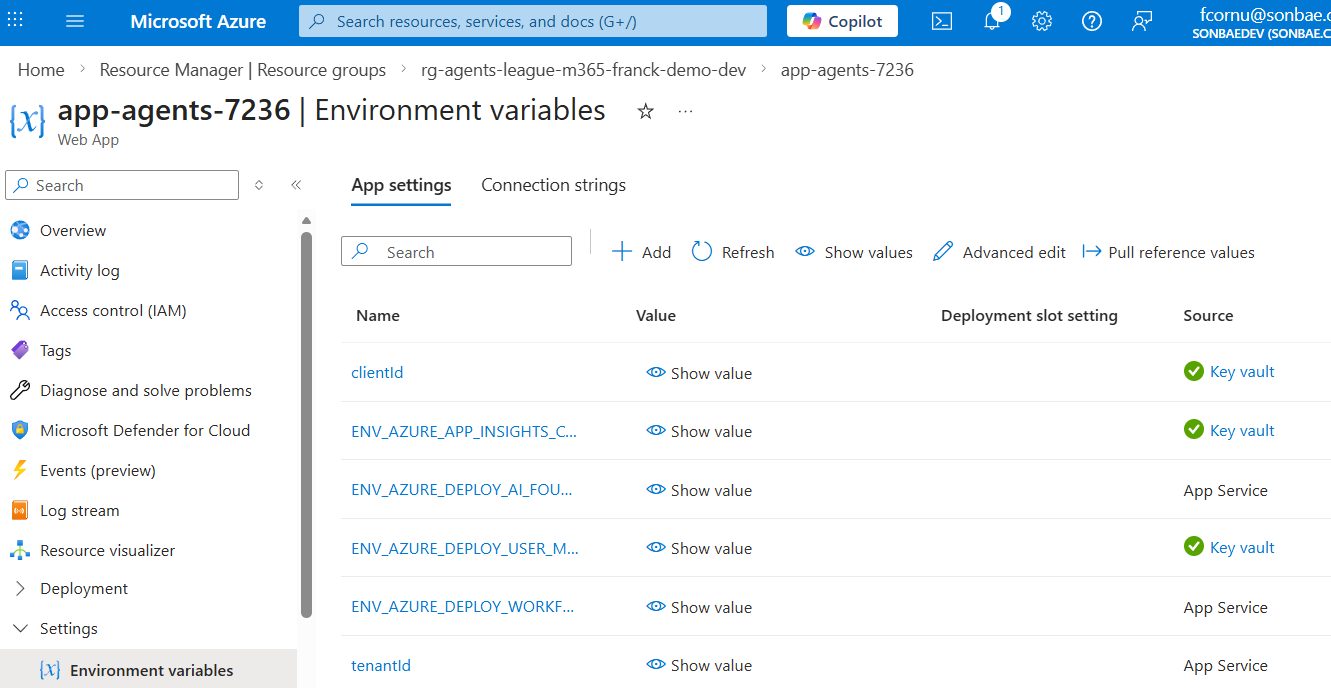
- Configure the web application environment variables linked to Key Vault.
- Build and deploy the agent application code to the App Service.
You can also deploy the application code alone using the deploy-app.ps1 script:
.\deploy-app.ps1 -WebAppName app-agents-<id> -ResourceGroupName rg-agents-league-m365-<id>
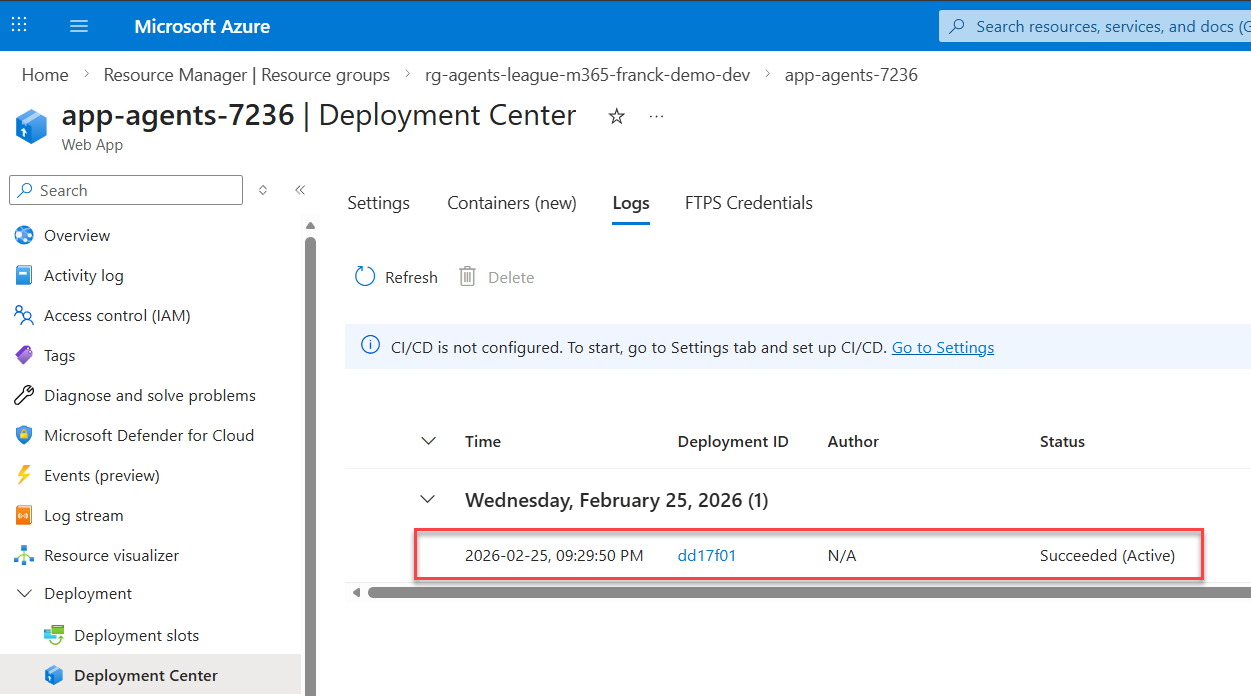
Verify the deployment
By the end of the deployment, you should see the following:
✅ Succeeded deployment stack with all resources created
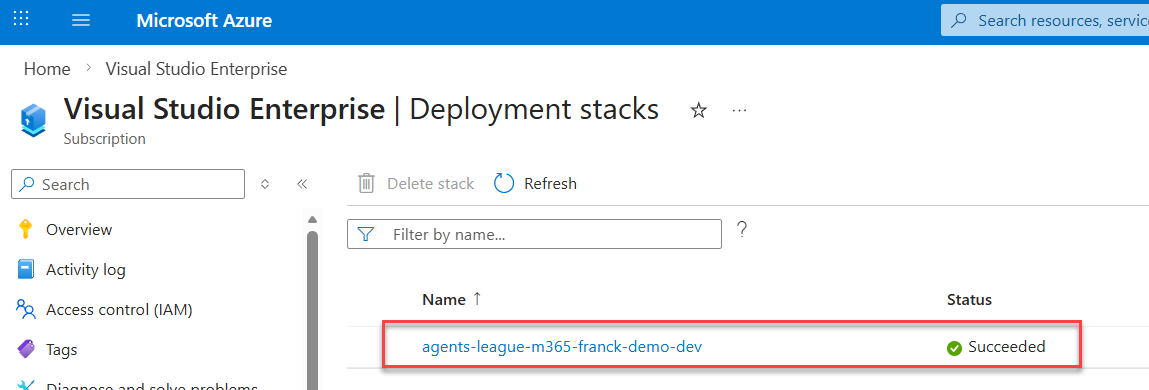
✅ All resources created in your resource group
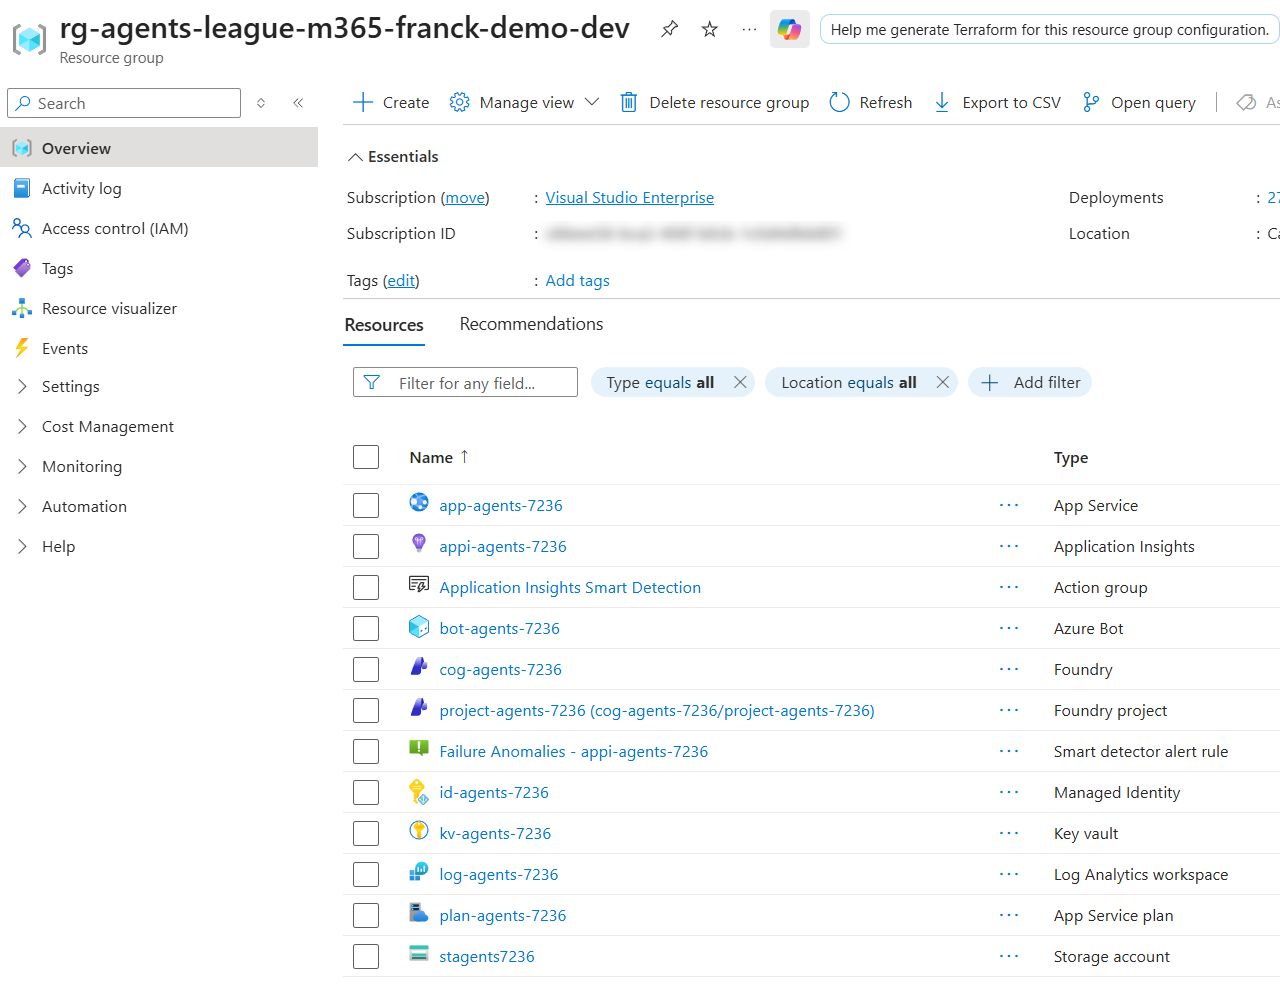
✅ Environment variables linked to Key Vault
✅ Application code deployed successfully
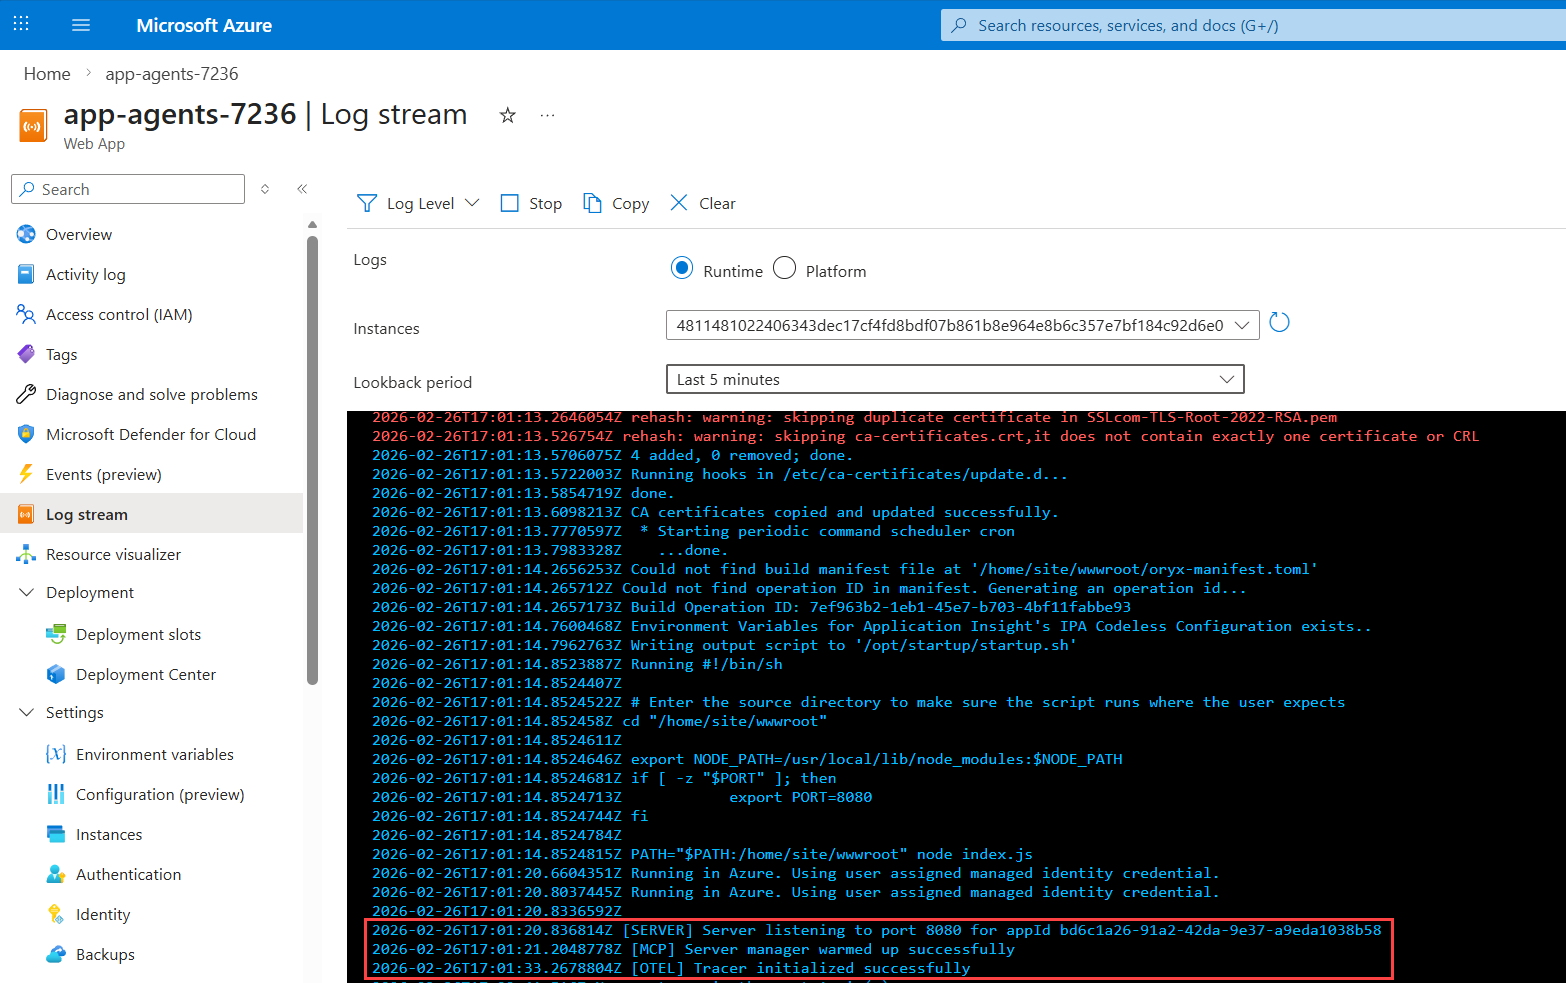
✅ Server started in the application log stream
Configure MCP in Foundry
Create an Entra ID application
To enable the OAuth Identity Passthrough feature and make requests to the Graph API on behalf of the user, you first need to register a new Entra ID application.
-
Create a new Entra ID application in the Azure portal.
-
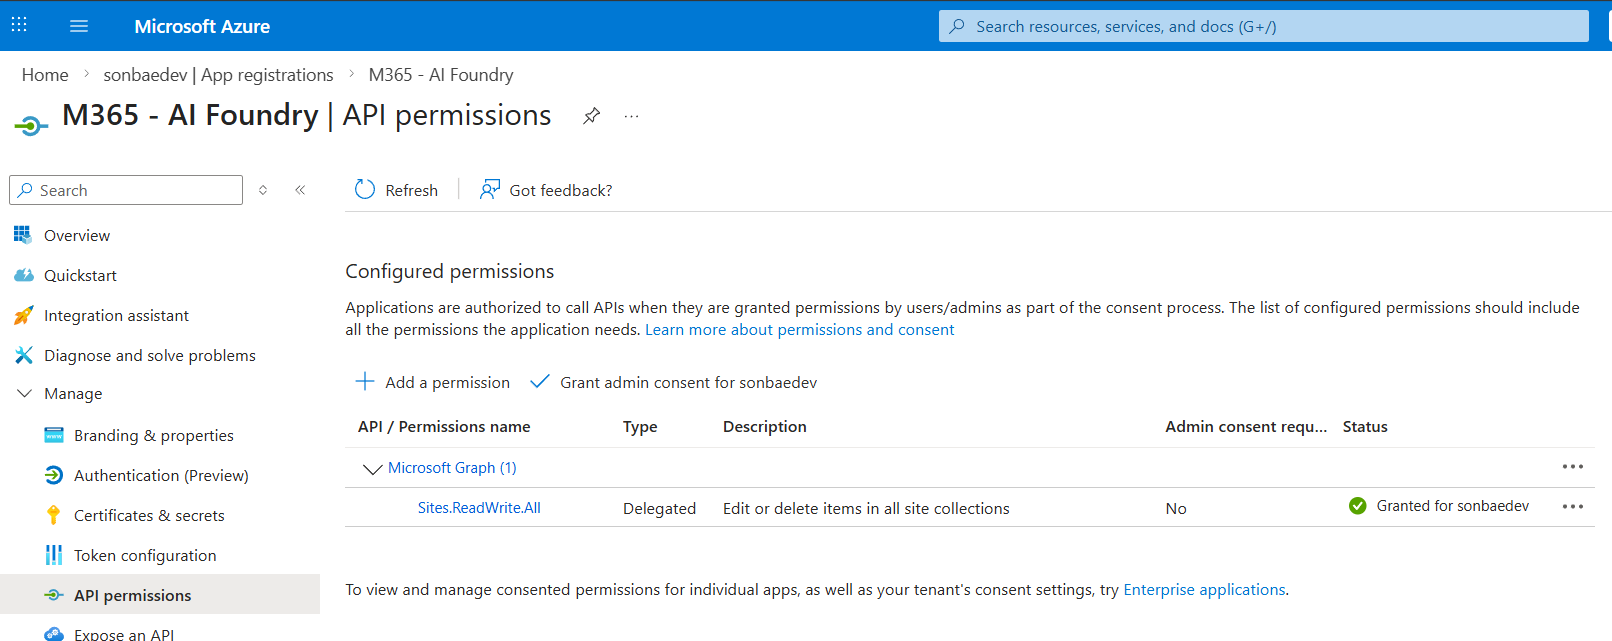
Add the following delegated permission for Microsoft Graph API:
Sites.ReadWrite.All— Allows the agent to read and write data in SharePoint on behalf of the user (i.e., Copilot Retrieval API and SharePoint list items for ticket submission).
-
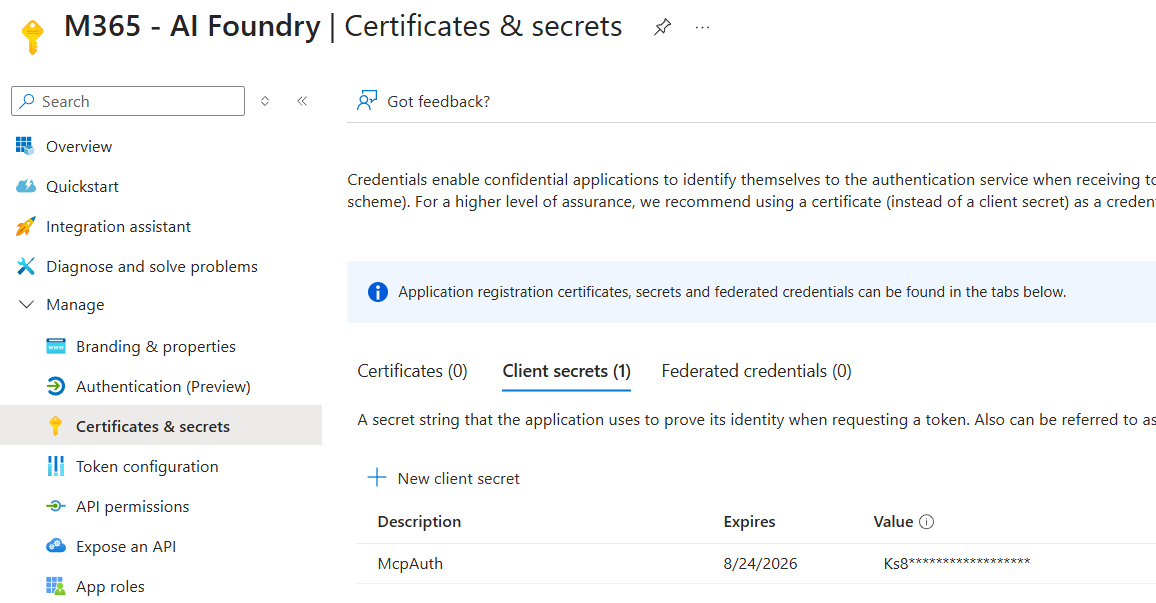
Create a new client secret and copy it. You'll need it in the next step.
Add a new MCP tool
-
Go to the Microsoft Foundry portal and open your project from https://ai.azure.com/nextgen. Then navigate to Build → Tools and click Connect a tool.

-
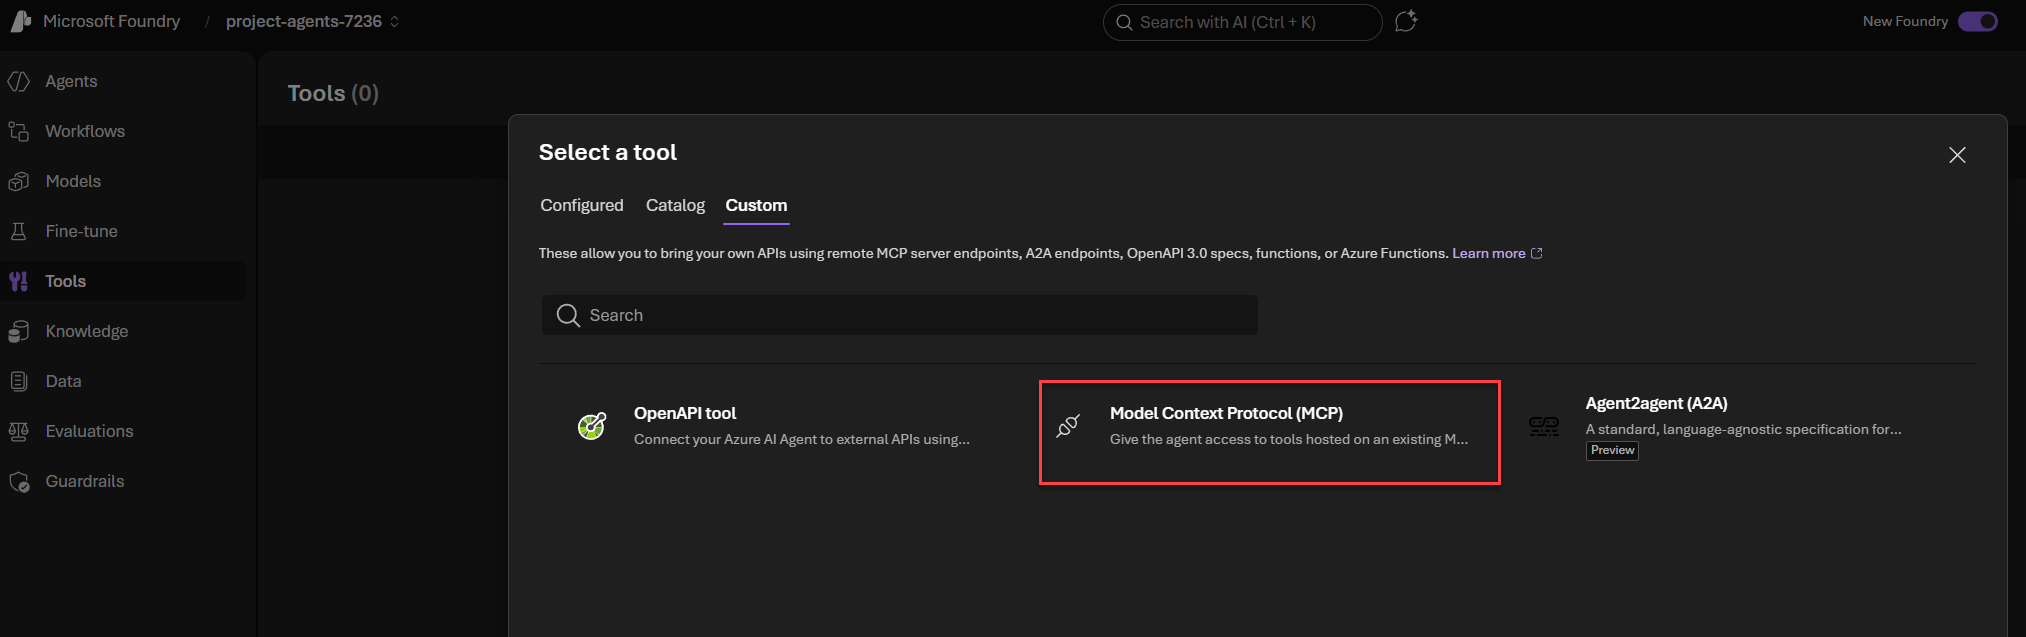
In the Custom category, select Model Context Protocol (MCP).
-
Fill in the MCP information as follows:
- Name —
mcp - Remote MCP Server endpoint
https://<your-app-service-name>.azurewebsites.net/api/mcp - Authentication — OAuth Identity Passthrough
Then fill in the OAuth details:
- Client ID — The client ID of the Entra ID application you created above
- Client secret — The client secret you created above
- Token URL
https://login.microsoftonline.com/{tenantId}/oauth2/v2.0/token - Auth URL
https://login.microsoftonline.com/{tenantId}/oauth2/v2.0/authorize - Refresh URL
https://login.microsoftonline.com/{tenantId}/oauth2/v2.0/token - Scope —
Sites.ReadWrite.All
noteReplace
{tenantId}with your actual Azure AD tenant ID in all URL fields.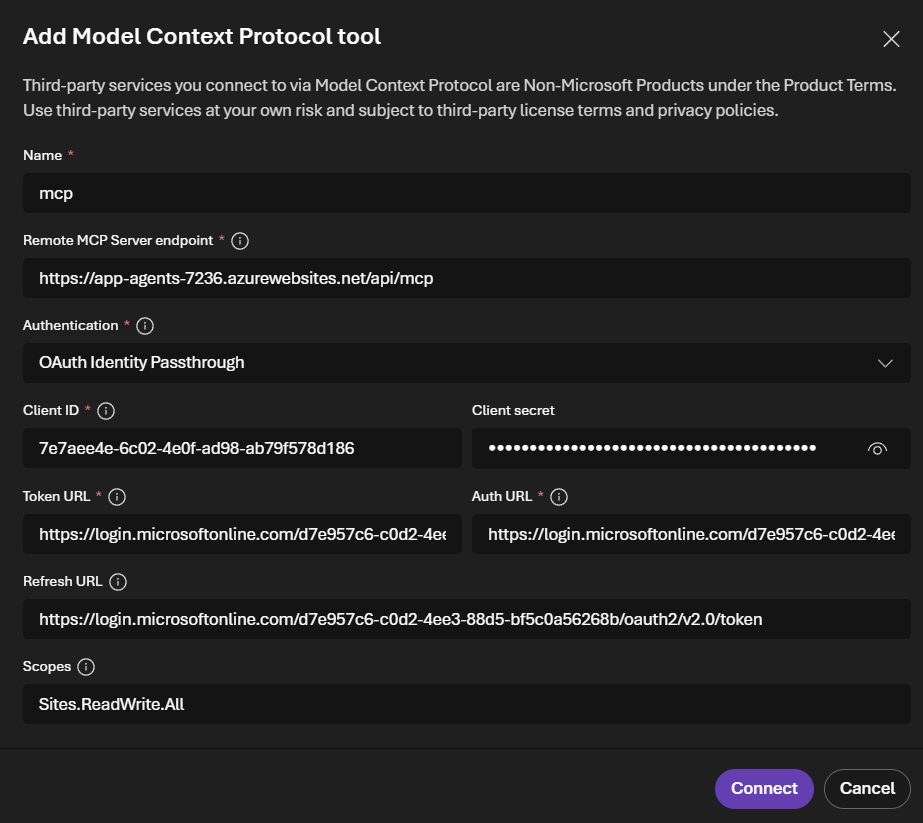
- Name —
-
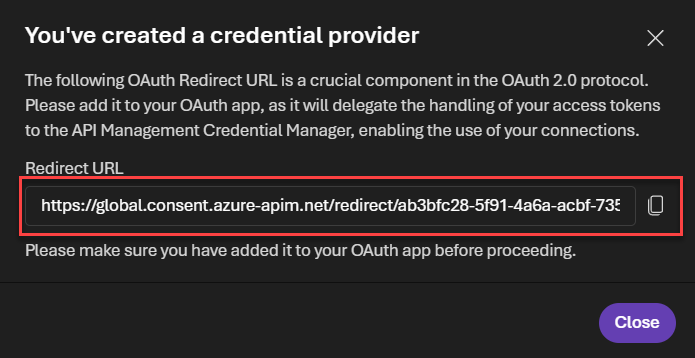
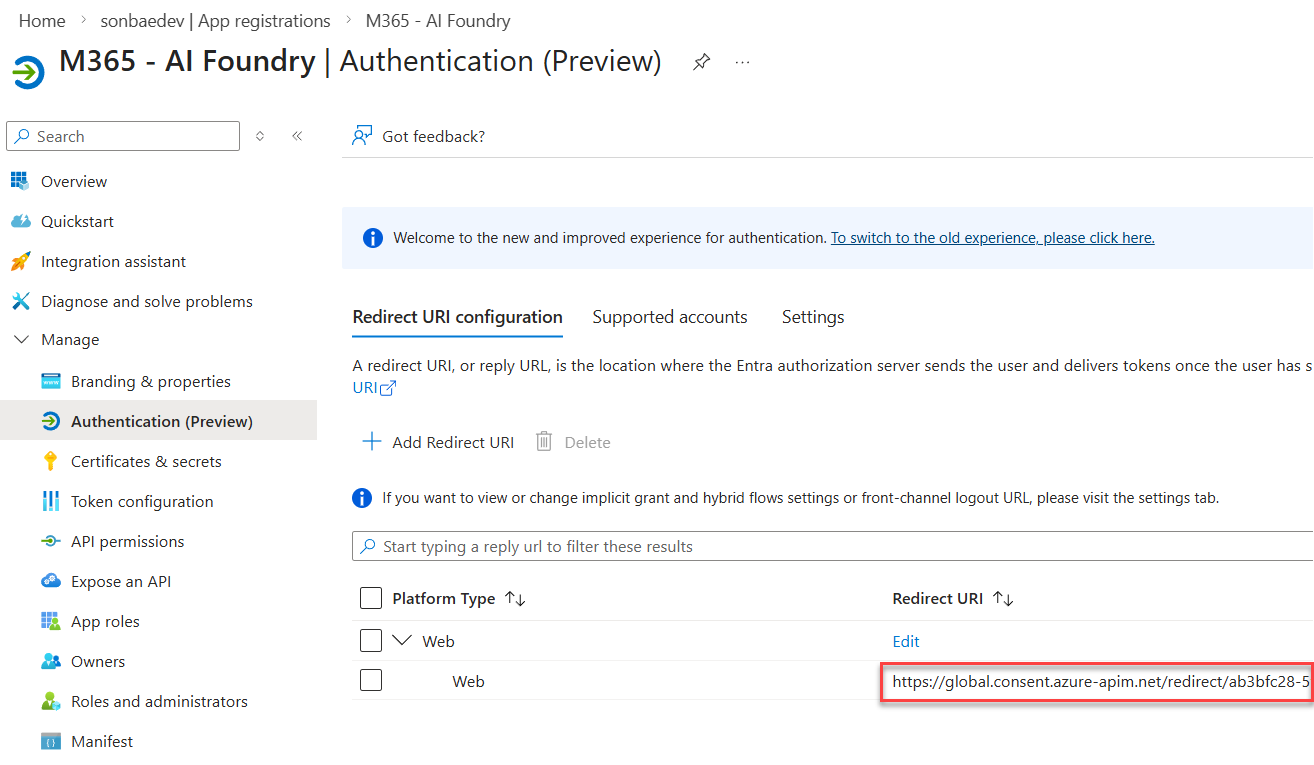
Click Connect. A prompt should appear with a redirect URL. Copy this URL and add it to the list of redirect URIs in your Entra ID application:
Set up agents in Foundry
Once the infrastructure is deployed and running, the next step is to set up your agents in Azure AI Foundry.
Update variables
Add the following variables to your variables.local.ps1 file:
| Variable | Description | Example |
|---|---|---|
ENV_MICROSOFT_FOUNDRY_ENDPOINT_URL | The endpoint URL for your Microsoft Foundry instance. Retrieve this from the home page of the Foundry account (new portal experience) at https://ai.azure.com/nextgen. | https://cog-agents-<id>.services.ai.azure.com/api/projects/project-agents-<id> |
ENV_MCP_SERVER_URL | The URL for the MCP server (without /api/mcp). | https://<your-app-service-name>.azurewebsites.net |
ENV_RETRIEVAL_FILTER_EXPRESSION_HR | The KQL filter condition to retrieve HR documents from a specific site. Use the path to the documents library where you uploaded the documents. | Path:\"https://<your-tenant>.sharepoint.com/sites/hr-portal/Shared%20Documents\" |
ENV_RETRIEVAL_FILTER_EXPRESSION_IT | The KQL filter condition to retrieve IT documents from a specific site. Use the path to the documents library where you uploaded the documents. | Path:\"https://<your-tenant>.sharepoint.com/sites/it-portal/Shared%20Documents\" |
Provision agents
From a pwsh terminal, execute the following script:
./setup-agents.ps1 -Verbose
This provisions all the needed agents in your Foundry project with the correct configuration (tools, environment variables, etc.) and the appropriate instructions.
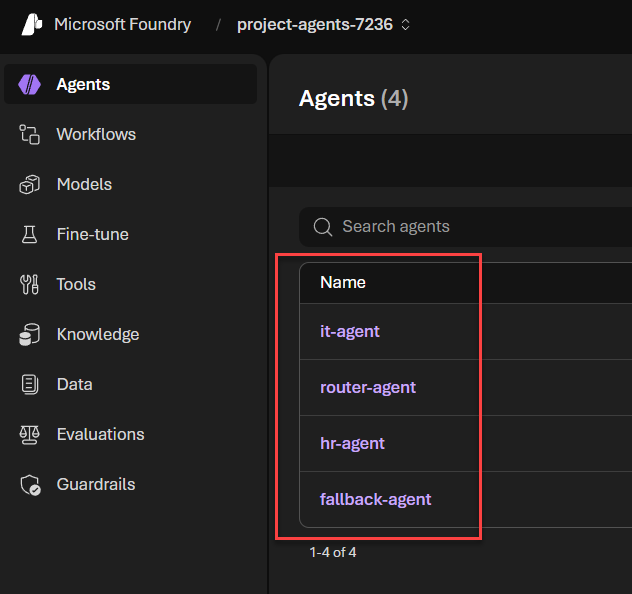
Agents overview
The following agents are created:
🖥️ it-agent
Handles IT-related questions and can submit support tickets.
📋 hr-agent
Handles HR-related questions grounded in policy documents.
🔀 router-agent
Routes questions to the right specialist agent (IT or HR) based on topic.
🛡️ fallback-agent
Handles all questions that fall outside the IT or HR scope.
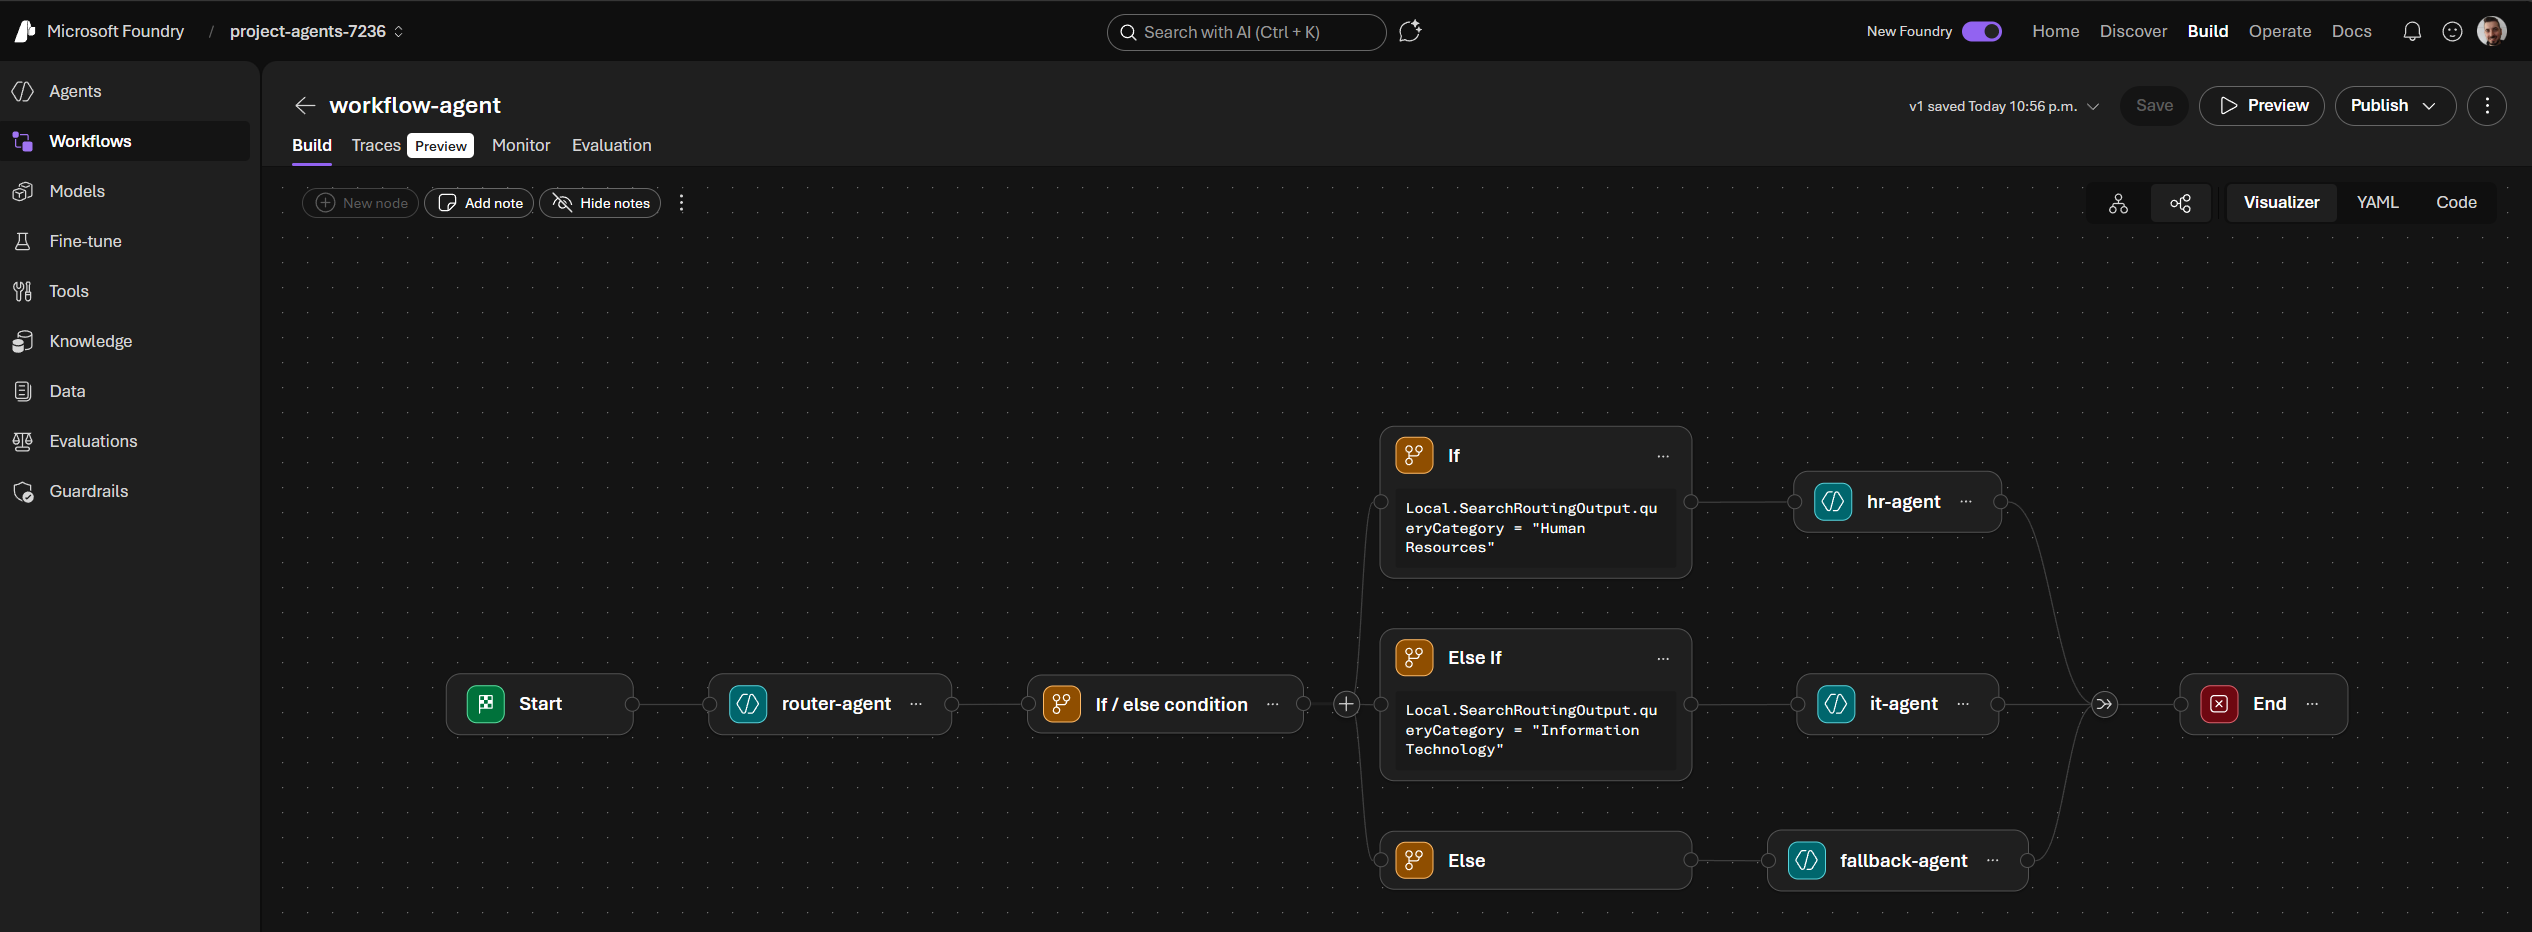
⚙️ workflow-agent
Orchestrates the conversation and calls the router agent at the beginning of each session to direct the question to the right specialist.
Package and upload the Teams app
The last step is to package the Teams application targeting the bot resources created in Azure.
Configure environment
From the /agent/env folder, rename .env.dev.example to .env.dev and set values for the following environment variables:
| Variable | Description | Example |
|---|---|---|
BOT_ID | The ID of the bot registered in Azure (i.e., the Microsoft App ID). | bd6c1a26-91a2-42da-9e37-a9eda1038b58 |
BOT_DOMAIN | The domain where the bot application is hosted (i.e., the Web App domain). | <your-app-service-name>.azurewebsites.net |
BOT_ID=bd6c1a26-91a2-42da-9e37-a9eda1038b58
BOT_DOMAIN=app-agents-7236.azurewebsites.net
Build and sideload
-
From the
/agentfolder, run the following command to package the Teams app:Package the Teams application as a ZIP fileatk package --env dev -i falseThis creates an
appPackage.dev.zipfile in the/agent/appPackage/buildfolder. -
Open the Microsoft Teams client (web or desktop) and go to Apps → Manage your apps → Upload an app → Upload a customized app. Select the
appPackage.dev.zipfile to sideload the bot to Teams.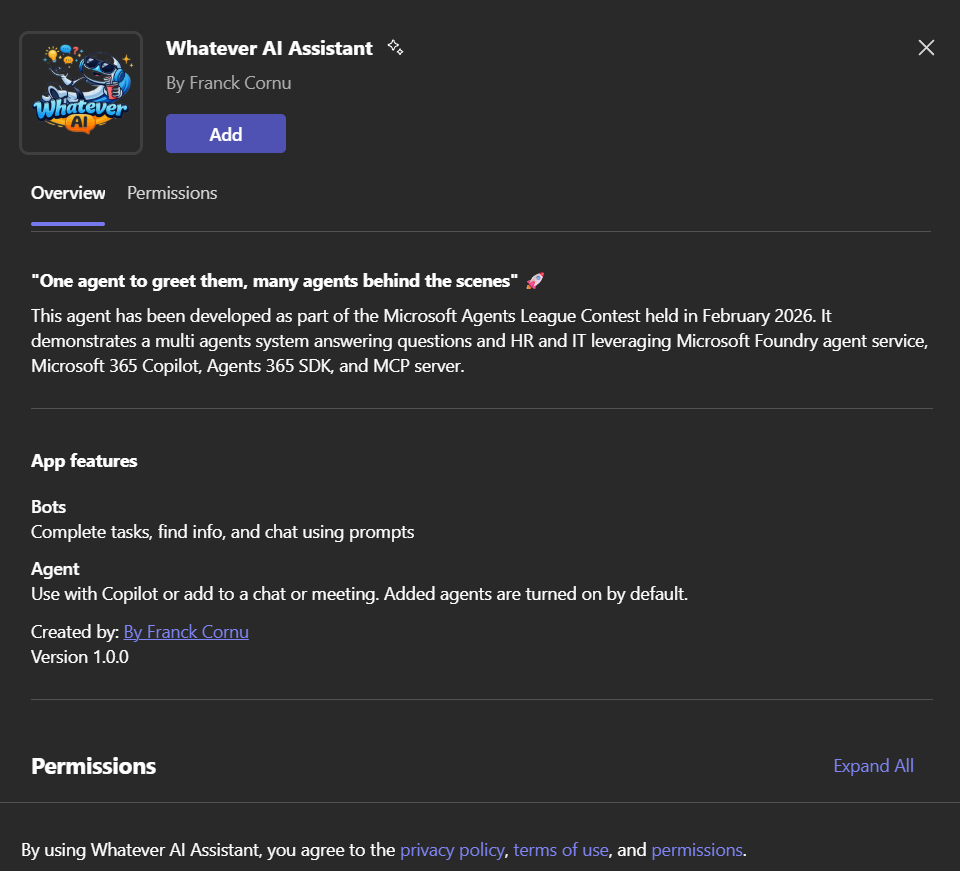
-
The app should now be available from both the Teams and Copilot channels, ready to use with the starter prompts. 🎉
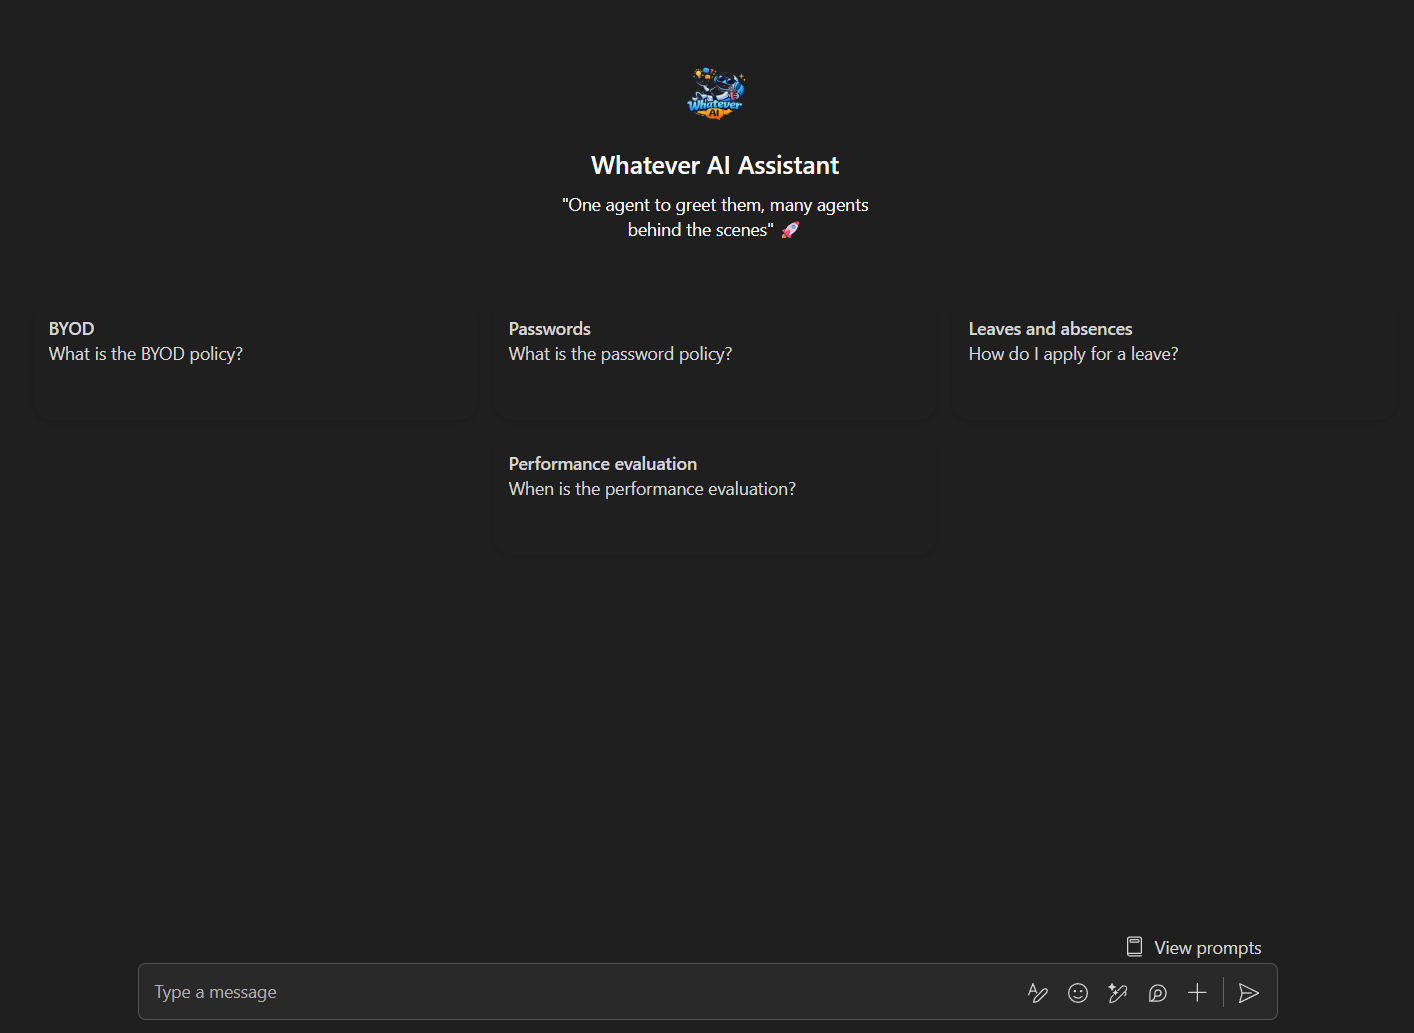
Talk to the agent
Now the fun part: testing the agent in Copilot! 🎉
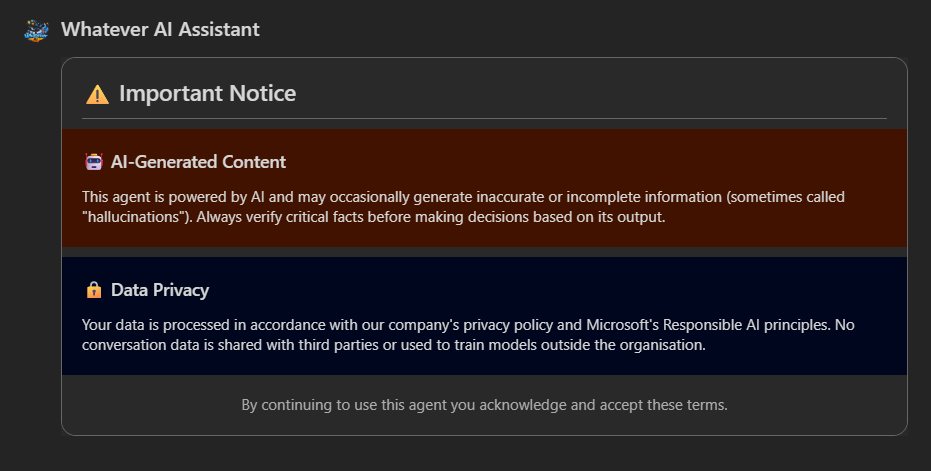
First Interaction — Disclaimer & Authentication
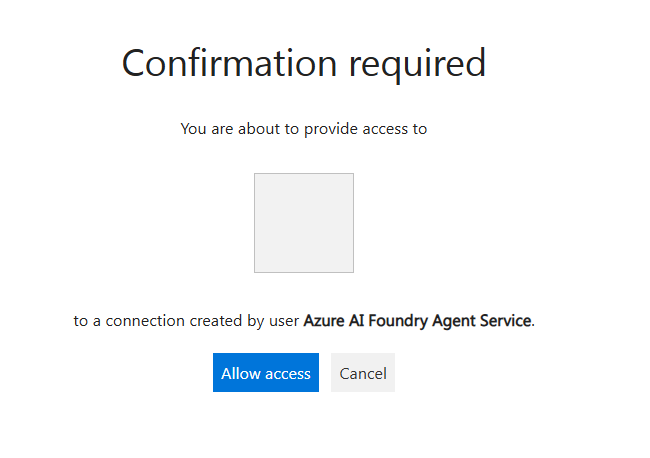
Open a new chat with the agent in the Copilot channel and ask the question "What is the parental leave policy?" (if you uploaded the given data in the first step). On the first interaction, the disclaimer should appear. Because this is the first time interacting with the agent, it will trigger the authentication flow. Follow the instructions to authenticate and consent to the permissions:
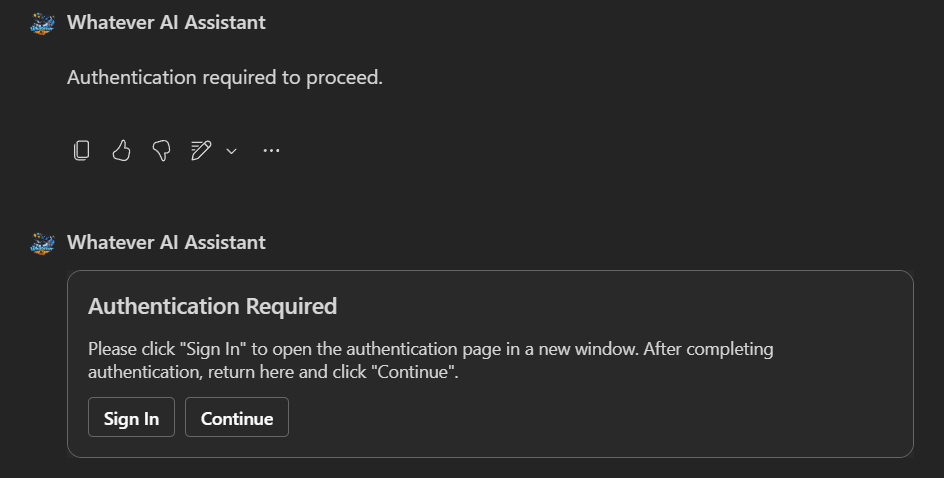
HR Query — Policy Retrieval
Click on Continue to continue agent processing. You should get the answer:
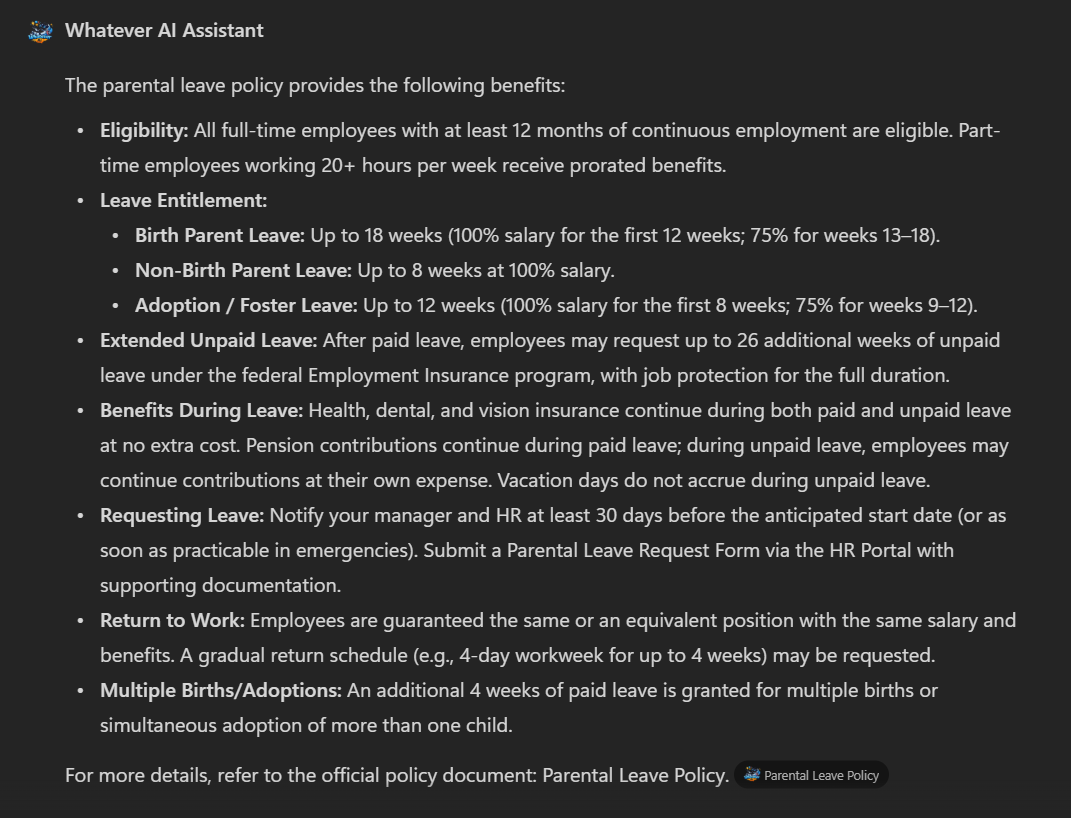
Behind the scenes, the workflow agent orchestrates the conversation and routes the question to the HR agent, which calls the Retrieval API to get relevant documents from SharePoint and generate an answer based on them.
IT Query — Cross-Domain Routing
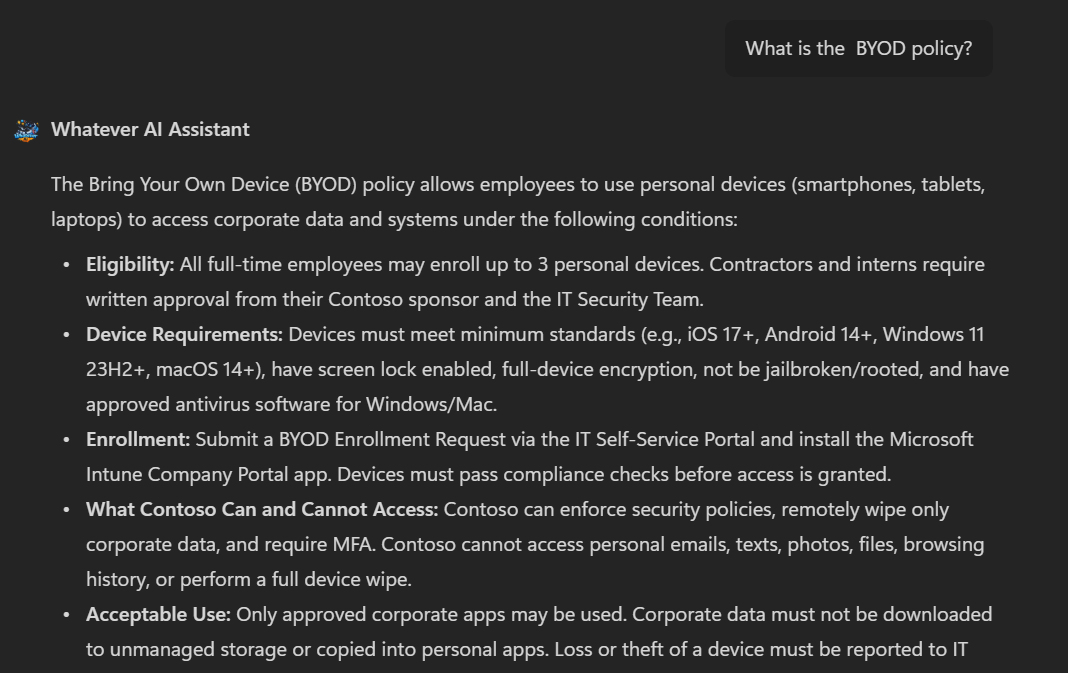
Now ask a question related to IT, for example: "What is the BYOD policy?". The workflow agent should route the question to the IT agent, which retrieves information from the IT SharePoint site and provides an answer:
Ticket Submission — Write Operations
Test the ticket submission system by asking a question that would trigger the fallback agent, for example: "I have an issue with my laptop, I want to raise a ticket". The fallback agent should recognize that this is an IT-related question and direct it to the IT agent. The IT agent will then ask for more details and send a card to gather information:
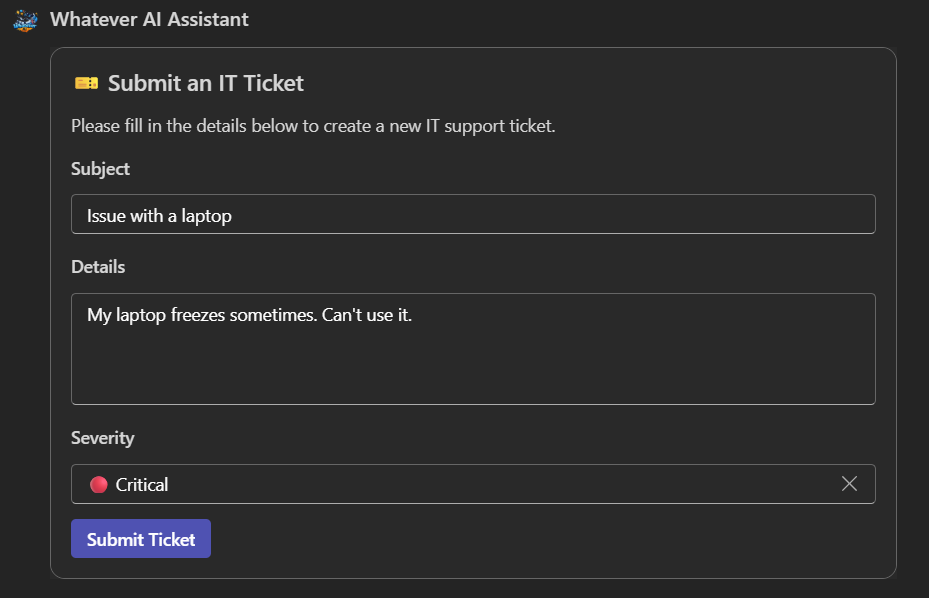
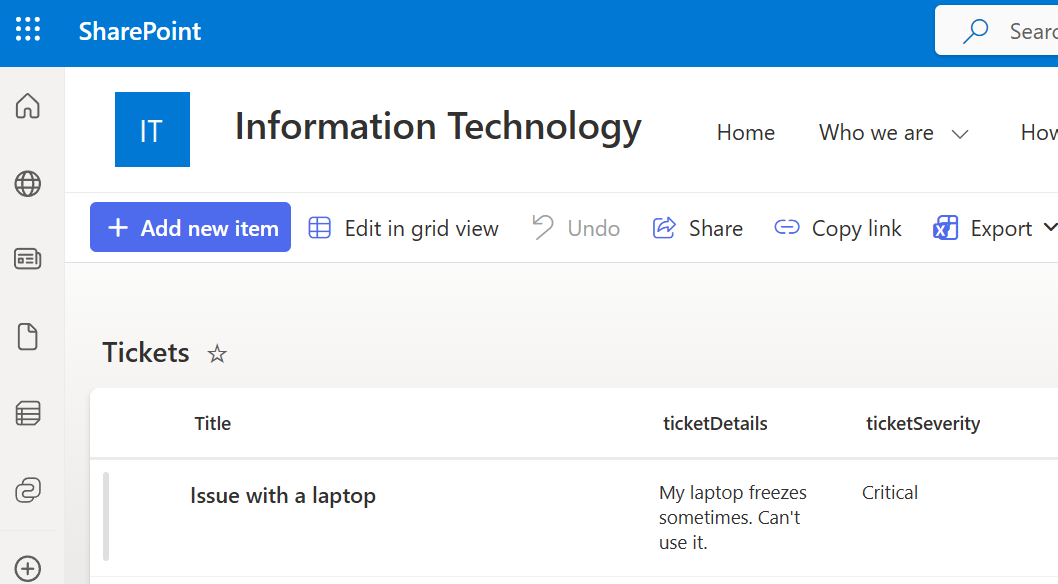
If the request succeeded, you should see the item created in the SharePoint list created earlier:
Debug Mode — Inspect Agent Reasoning
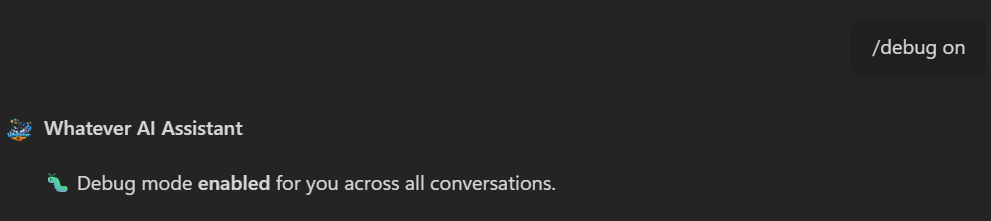
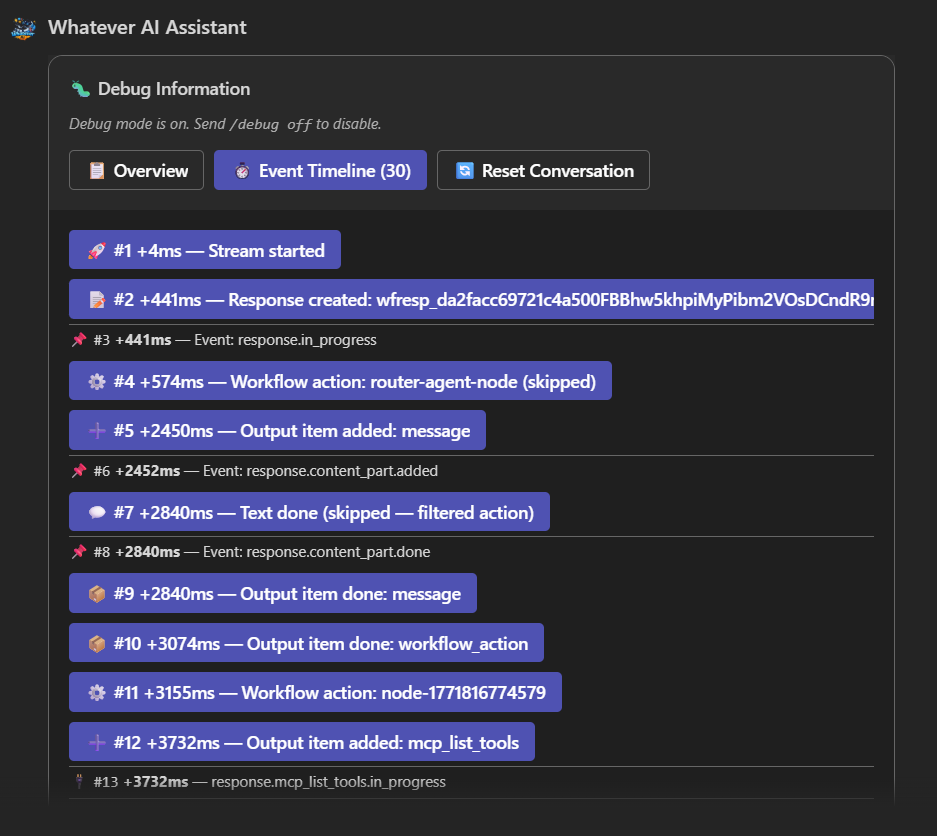
Activate the debug mode using the command /debug on and ask a new question like "What is the password policy?". After the agent answers, the debug pane should appear showing the full agent events history, including all the tool calls and their outputs:
Bonus — Tool Approval with Prompt Agents
Because Foundry workflows don't support tool approval, you can test this feature in our solution by targeting a specific agent like hr-agent instead of the workflow agent.
Follow these three steps to enable tool approval:
1. Switch to a Prompt Agent
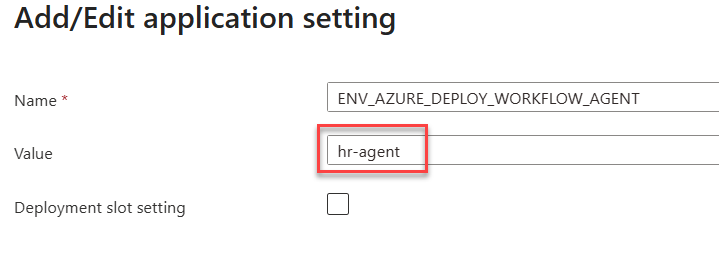
Change the app service environment variable ENV_AZURE_DEPLOY_WORKFLOW_AGENT to target the hr-agent directly and restart the web application:
2. Enable Tool Approval in MCP Configuration
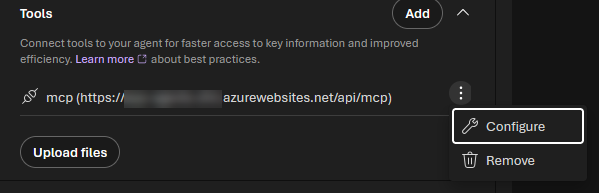
In Foundry, update the MCP tools configuration for the hr-agent to ask for approval:
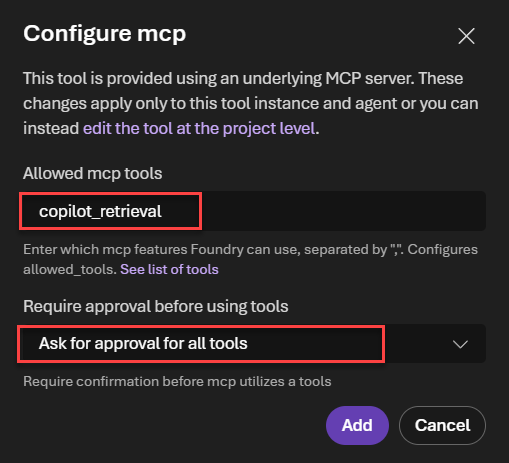
When setting Ask for approval for all tools, it is mandatory to specify explicitly the allowed tools (here copilot_retrieval).
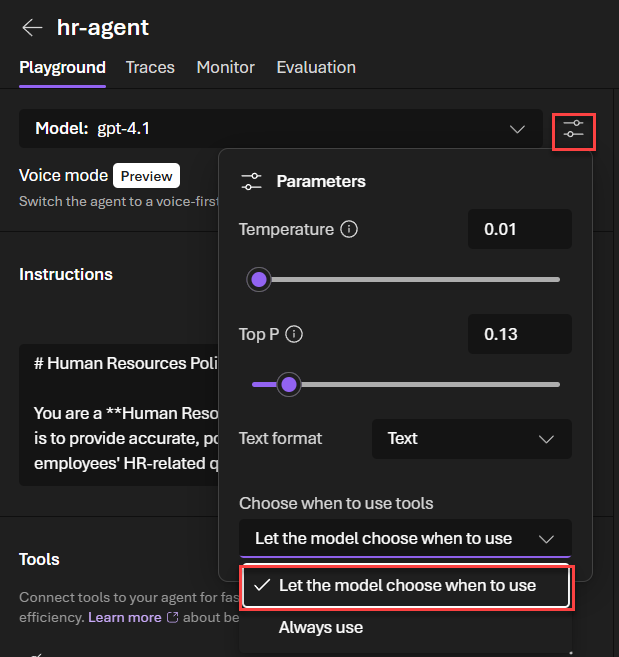
3. Update Agent Tool Selection
To avoid an approval request endless loop, update the agent to let it select the tool when needed. Don't forget to save the agent.
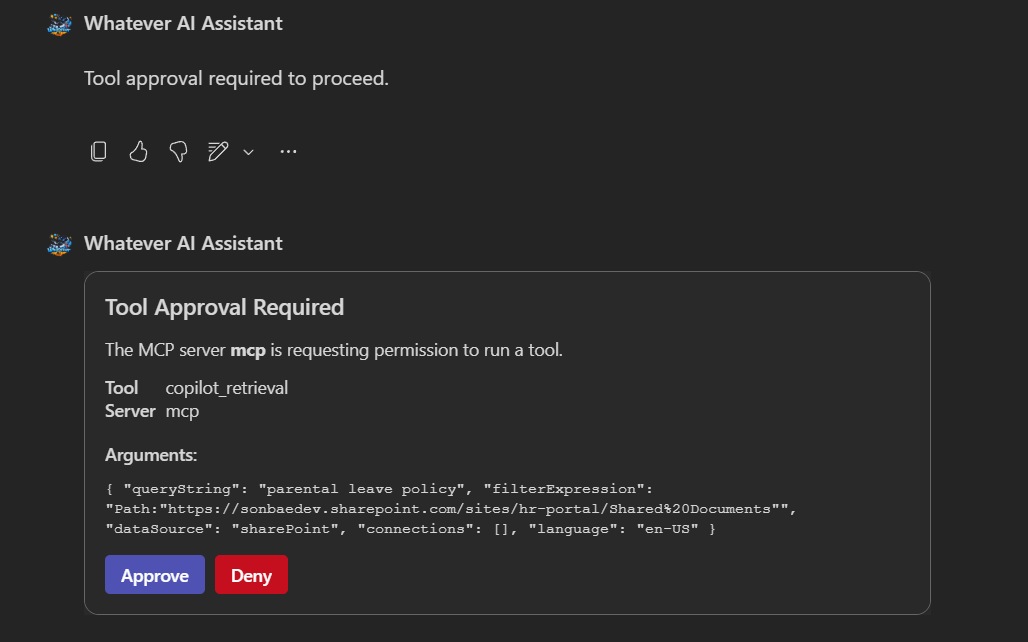
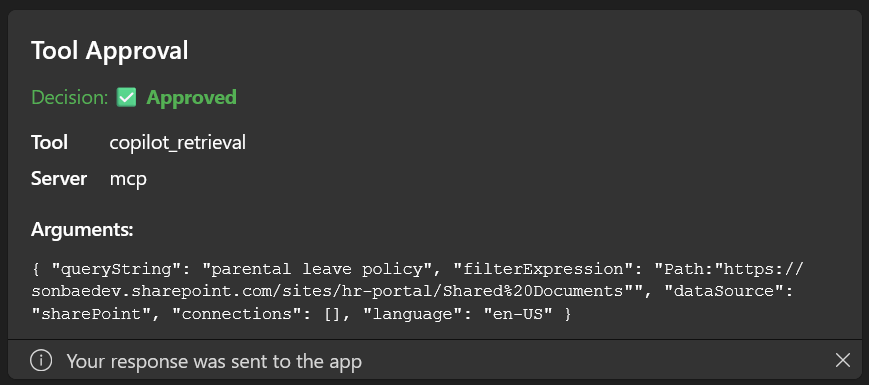
Open a new chat in the Copilot application to reset the conversation (you can also use the /reset command). Now the next question you ask (e.g., "What is the parental leave policy?"), you should be prompted to approve the tool calls in the portal before getting the answer:
On Teams experience, the card is updated with the user choice. However, it seems that is not possible to achieve the same in the Copilot channel (meaning the approval card is not updated).
Also, there is no 'Approve once' mechanism in Foundry. To get such behavior, you'll need to implement it yourself in the agent code by storing the user choice in a database and checking it before sending the tool call.
Notice that the agent logic code remains exactly the same whether you use a workflow agent or a prompt agent!
It may take a few minutes and several attempts before the agent changes are reflected in the Copilot chat.
Doing this change will break the workflow agent if you want to revert back (see Implementation Strategies). You'll need to set up agents by scripts again to fix the configuration.